
Connect with me
3
16
I'm sunith vs, a seasoned Backend Developer at Eduport with expertise in building scalable, efficient solutions. As a CUSAT CFI alum, I leverage my passion for engineering to drive innovative projects, utilizing languages such as Python and frameworks like Django. With 146+ open-source repositories and 191+ followers, I collaborate with the community to deliver high-quality code and foster professional growth.
Perinthalmanna, Malappuram,Kerala ,India

Your Mac says “Storage Almost Full.” Finder isn’t helping. Time to open the Terminal.Warning: The commands in this guide permanently delete files. There is no undo. Always double-check folder paths before running rm -rf, quit apps before clearing their cache, and never touch system directories like /System, /Library, /usr, or /var. If you're unsure about a command, don't run it.We’ve all been there. The dreaded notification pops up: Storage almost full. You dutifully open Finder, drag some old downloads to the Trash, empty it with a satisfying crunch - and the bar barely moves. Still red. Still full.Here’s the thing most people don’t realize: the files eating your disk aren’t sitting in Downloads or Documents. They’re buried deep inside hidden application containers and caches that macOS politely keeps out of sight. Messaging apps like WhatsApp and Telegram are some of the worst offenders, quietly hoarding every image, video, and voice note you’ve ever received - sometimes totaling over 100GB.I recently went through this exact exercise and recovered 120GB in about ten minutes. No third-party apps. No paid “cleaner” software. Just the Terminal and a few commands.Let me walk you through it.Step 1: Open Terminal and Survey the DamageLaunch Terminal (press Cmd + Space, type "Terminal") and run your first command:bashdu -h -d 1 ~ | sort -hrThis shows disk usage for every top-level folder in your home directory, sorted biggest first. On my machine, the output looked something like this:131G /Users/me/Library12G /Users/me/Downloads6G /Users/me/Documents131GB in Library. That’s the folder macOS hides from you in Finder by default. And that’s where the mystery lives.Step 2: Drill Into Librarybashdu -h -d 1 ~/Library | sort -hrMy results pointed straight to the culprit:131G Group Containers8.7G Application Support5.5G CachesGroup Containers is where sandboxed apps store their data. Let’s go deeper.Step 3: Find the App That’s Hoarding Spacebashdu -h -d 1 ~/Library/Group\ Containers | sort -hrAnd there it was:124G group.net.whatsapp.WhatsApp.shared6.8G ...Telegram124GB. WhatsApp Desktop had been faithfully downloading and caching every photo, video, and document from every group chat I’d ever been in. Years of accumulated media, sitting silently on my disk.Step 4: Clean It UpBefore touching anything, I quit WhatsApp completely. This is important , deleting cache files while an app is running can cause crashes or immediate re-creation of those files.Then:bashrm -rf ~/Library/Group\ Containers/group.net.whatsapp.WhatsApp.shared/Message/*That’s it. One command. 120GB recovered.When I reopened WhatsApp, all my chats and messages were still there. Media just showed a small download icon ,tap it, and it re-downloads from your phone. Nothing is lost.Bonus: Clear System Caches and TelegramWhile I was at it, I cleared the general cache folder:bashdu -h -d 1 ~/Library/Caches | sort -hrrm -rf ~/Library/Caches/*Apps rebuild their caches automatically, so this is safe. I also hit Telegram’s local storage:bashrm -rf ~/Library/Group\ Containers/6N38VWS5BX.ru.keepcoder.Telegram/*Telegram keeps everything in the cloud, so files download again on demand. Another few gigabytes freed.A Few WarningsThe Terminal is powerful, and rm -rf doesn't ask for confirmation. A few ground rules:Never delete system directories. Stay away from /System, /Library (the root one, not your user Library), /usr, and /var. Deleting files there can break macOS entirely.Always quit the app first. Running apps may crash, behave unpredictably, or instantly recreate the files you just deleted.Double-check your paths. Read the command twice before pressing Enter. There’s no Trash, no undo. One wrong character in a path can mean losing important data.Expect media to re-download. If you’re on a slow connection, images and videos in your chats will take time to load again as you scroll through old conversations.Why This Happens in the First PlaceModern messaging apps auto-download media by default. A handful of active group chats can generate thousands of images and videos per month. Over a year or two, that’s easily 50–100GB of cached files that you never asked for and probably never opened.macOS doesn’t surface this in the “Manage Storage” interface in any useful way. The storage breakdown labels it as “Other” or “System Data” , which tells you nothing.Making This a HabitI now run one command once a month:bashdu -h -d 1 ~ | sort -hrIt takes five seconds and immediately tells me if something is growing out of control. Think of it as a quick health check for your disk.You can also go into WhatsApp and Telegram settings to disable auto-downloading media, which slows the accumulation dramatically.The TakeawayThe next time your Mac tells you it’s running out of space, don’t buy a new drive. Don’t pay for a cleaning app. Open Terminal, run du, and follow the trail.Sometimes the solution to a 120GB storage mystery is just a few lines of coding.Sunith VS is an indiehacker and vibecoder building products at the intersection of developer tools and travel tech. Creator of JioBase, DevB.ioLinks:JioBase: https://jiobase.comTopmate: https://topmate.io/sunithvsX: https://x.com/sunithvs_/Sunith V S: https://sunithvs.comGitHub: https://github.com/sunithvs/jiobaseBuy Me a Coffee: https://buymeacoffee.com/sunithvs

instoobI run an Instagram account called @truevibecoder where I post coding content — short reels, tips, behind-the-scenes stuff. I’d been grinding, uploading consistently, and things were going well. 17 reels in the last few days.Then I looked at my YouTube channel.Zero. Nothing. Empty.Not a single reel had made it to YouTube Shorts. Because I was supposed to do that manually — download from Instagram, open YouTube Studio, upload, copy the caption, add tags, publish. For every. single. reel.Yeah, I wasn’t doing that.“There’s Gotta Be a Tool for This”So I went looking. Surely someone has solved this, right?They have. And they all want your money.Repurpose.io — $15/month. Pabbly — paid. Make.com — credits that run out. Some random SaaS — $30/month to literally move a video file from point A to point B.I’m not paying a monthly subscription to copy-paste a video across platforms. That felt absurd. It’s 2026. This should be free.So I Built It MyselfMeet instoob — instoob.radr.inI built it with my buddy Claude (yes, the AI — and yes, it was genuinely like pair programming with someone who never gets tired).The idea was simple: build a tool that watches my Instagram for new Reels, downloads them, and uploads them to YouTube as Shorts. Automatically. Without me touching anything.But the real question was — where does this thing run?No Server. No VPS. No Bills.This is my favorite part.instoob doesn’t run on a server. It doesn’t run on AWS. It doesn’t run on a $5/month VPS. It doesn’t run on Cloudflare Workers.It runs on GitHub Actions.Your GitHub repo is your entire backend. GitHub gives you free compute minutes, built-in cron scheduling, and encrypted secrets management. That’s literally everything this tool needs.Here’s what happens every time the workflow triggers:GitHub spins up a fresh Ubuntu runnerThe script checks your Instagram for new ReelsDownloads any new ones it findsUploads them to YouTube as Shorts (with the caption, hashtags, everything)Records what’s been synced so it doesn’t duplicateCleans up and shuts downNo server sitting idle. No monthly bill. No infrastructure to maintain. Just a repo with a cron job that runs itself.How It Actually WorksLet me break down what’s happening under the hood.The Instagram SideThe tool uses Instaloader, which is a well-maintained Python library for interacting with Instagram. It logs in with your session, hits your profile, and grabs any Reels that are newer than the last sync.The tricky part is session management. Instagram sessions expire, and if you’re running this in a stateless environment like GitHub Actions, you need to persist that session between runs. We handle this with GitHub’s caching — the session file gets saved after each run and restored at the start of the next one.The YouTube SideYouTube has an official API for this — the YouTube Data API v3. You use the videos.insert endpoint to upload a video, and if you add #Shorts to the description and the video is under 60 seconds, YouTube automatically treats it as a Short.Authentication is OAuth 2.0. You do the auth flow once on your local machine, get a refresh token, store it in GitHub Secrets, and the script mints fresh access tokens at runtime. The refresh token doesn’t expire unless you revoke it, so this is basically set-and-forget.The GlueA SQLite database tracks everything — which Reels have been synced, when, and what YouTube video ID they got. This DB gets cached between GitHub Actions runs, so even though each run starts on a fresh machine, the state persists.The sync logic is dead simple:new_reels = fetch_reels_from_instagram()already_synced = check_database()to_sync = new_reels - already_syncedfor reel in to_sync: download(reel) youtube_id = upload_to_youtube(reel) mark_as_synced(reel, youtube_id) cleanup()That’s it. No message queues. No microservices. No Kubernetes. Just a Python script, a database file, and a cron job.The GitHub Actions WorkflowThe workflow file is surprisingly short. A cron schedule, Python setup, dependency install, cache restore, run the script, cache save. You can also trigger it manually from the Actions tab whenever you want an instant sync.The secrets (Instagram session, YouTube OAuth tokens) live in GitHub’s encrypted secrets store. They never appear in logs, never touch disk unencrypted.What I LearnedYou don’t always need a server. GitHub Actions is genuinely powerful for lightweight automation. If your task runs in under 10 minutes and doesn’t need a persistent connection, you probably don’t need a VPS.The YouTube API is surprisingly straightforward. I expected OAuth hell. It was one afternoon of setup, and then it just worked. The quota (10,000 units/day, 1,600 per upload) means you can upload about 6 Shorts per day on the free tier — more than enough for most creators.Instagram is the harder side. Sessions expire, rate limits are aggressive, and there’s no official API for downloading your own Reels. Instaloader handles most of this, but you need to be smart about session persistence and error handling.Building with AI is wild. Claude helped me think through the architecture, debug edge cases, and write the boring parts. It’s like having a co-founder who’s really good at the parts you don’t want to do.Why I’m Sharing ThisBecause I think it’s ridiculous that creators are paying monthly subscriptions to sync content across platforms. This is a solved problem. The tools exist. The APIs are free. The compute is free.You shouldn’t need to pay $20/month to move your own videos from one place to another.instoob is open and free. Check it out at instoob.radr.in — set it up once, and never think about syncing your Reels again.Sunith VS is an indiehacker and vibecoder building products at the intersection of developer tools and travel tech. Creator of JioBase, DevB.ioLinks:JioBase: https://jiobase.comTopmate: https://topmate.io/sunithvsX: https://x.com/sunithvs_/Sunith V S: https://sunithvs.comGitHub: https://github.com/sunithvs/jiobaseBuy Me a Coffee: https://buymeacoffee.com/sunithvs

By Sunith VS (@sunithvs_ | @truevibecoder)I built JioBase in 2 hours using Claude Code. It went viral, served 14 million requests, and survived a 200 million request DDoS attack. All of this from a solo developer with zero marketing budget.Vibe coding made that possible. But vibe coding done wrong can also get you breached, burned out, or shipping garbage at scale.Here’s everything I’ve learned about doing it right.What Is Vibe Coding?Vibe coding is building software by describing what you want in plain language and letting AI generate the code. You’re not writing syntax. You’re directing. The AI writes, you guide, review, and ship.Andrej Karpathy coined the term in early 2025. Since then it’s gone from a meme to a legitimate way of building products. Founders, indie hackers, designers, and even non-developers are shipping real products with it.But here’s what most people miss: vibe coding is not about ignoring code. It’s about shifting your relationship with it.The Fundamentals Still MatterThis is the part nobody wants to hear.You don’t need to write every line yourself. But you need to understand what the code is doing. If you can’t read through a diff and know whether something is safe, you’re flying blind.You should know:How authentication works (sessions, JWTs, OAuth)What a database query is and how SQL injection happensWhat an API endpoint does and who can call itWhat environment variables are and why they must never be hardcodedBasic networking (what a proxy is, what DNS does, what CORS means)These aren’t advanced topics. They’re the baseline. Without them, you’re not a vibe coder. You’re just a vibe clicker hoping nothing breaks.A 2025 Veracode report found that 45% of AI-generated code introduces security vulnerabilities. AI-assisted code shows security issues 2.74x higher than human-written code. The AI doesn’t know why a security check exists. It just knows how to make the error go away.The Real Risks of Vibe Coding1. Security DebtAI optimizes for making code run, not making it safe. It will remove validation checks, relax database policies, or skip auth flows to resolve a runtime error. If you don’t review, you ship the hole.2. Hallucinated DependenciesLLMs will confidently reference packages that don’t exist. These hallucinated package names can be registered by bad actors with malicious code. Always verify every dependency you install.3. Hardcoded SecretsAI will sometimes write API keys, database URLs, and credentials directly into code. Always check your code before committing. Use environment variables. Never push secrets to GitHub.4. No Understanding of ContextThe AI doesn’t know your business logic. It doesn’t know that this field should never be public, or that this endpoint should require admin access. You do. Tell it explicitly.5. Moving Too FastThe biggest vibe coding risk isn’t technical. It’s psychological. When you can ship in 2 hours, you will skip testing. You will skip reviewing. You will skip thinking. Slow down for the important parts.Best Practices for Responsible Vibe CodingBreak It Into Small TasksDon’t give AI one giant prompt and hope for the best. One feature at a time. One component at a time. Review before moving on.Read the Diff Every TimeBefore you accept any change, read what changed. Not the whole file. The diff. Know what was added and what was removed. This is non-negotiable.Write Tests EarlyAsk the AI to write tests alongside the code. Not after. Alongside. If you can’t test it, you don’t understand it well enough to ship it.Review Security ExplicitlyWhen building anything with auth, payments, or user data, ask the AI: “What are the security risks in this code?” Then verify the answers yourself.Use Environment Variables AlwaysNever hardcode credentials. Never. Create a .env file. Add it to .gitignore. Check your commits before pushing.Keep a Prompt LogDocument what you asked for and what you got. This becomes your debugging trail when something breaks at 2am.Don’t Let AI Touch Production DirectlyReview and test in a staging environment first. Especially database migrations. Especially auth changes. One wrong query can wipe data. AI doesn’t know that your users’ data matters.Tools I Actually UseClaude CodeMy primary tool. It’s not just autocomplete. It’s a full coding agent that can plan, execute, debug, and iterate. I built JioBase entirely with it. The key is treating it like a junior developer, not a magic button.Claude Cowork (Desktop)For everything that isn’t pure coding. Writing, planning, drafting social posts, filling out forms, thinking through product decisions. It runs locally on your machine and feels like having a thinking partner open all the time.Skills in ClaudeClaude supports skills, which are reusable instruction sets for specific tasks. There are skills for creating docx files, pptx presentations, PDFs, spreadsheets, and more. Before creating any document or file, check if a skill exists. It will save you time and produce better output.MCP ServersMCP (Model Context Protocol) is how you connect Claude to external tools and data sources. This is where things get really powerful.Figma MCP is one of the most useful ones for builders. You can point Claude at a Figma design and ask it to generate code directly from the design. No more manually translating designs to components. The AI reads the design, understands the layout, and writes the implementation.Other useful MCPs include database connectors, GitHub, Slack, and browser automation. Every MCP server you connect expands what Claude can do without leaving the conversation.My Personal RecommendationsAlways Stay Updated with AI ToolsThe AI tooling landscape moves faster than any other space in tech right now. Tools that didn’t exist 6 months ago are now essential. Make it a habit to check what’s new every few weeks. Try things. Most tools have free tiers.Try Every New Tool for One Real ProjectDon’t just read about tools. Use them. Give each new tool one real task from a project you’re actually working on. That’s the only way to know if it’s worth adding to your workflow.Follow the Builders, Not Just the InfluencersThe best vibe coding knowledge comes from people who are actively shipping things. Follow indie hackers, solo developers, and open source builders. They share real lessons, not polished takes.Build in PublicShip early. Share your process. Post your failures alongside your wins. The feedback you get from building in public is faster and more honest than anything else. I built JioBase and posted about it the same night. The community response shaped the product within 24 hours.Your Taste Is Your Competitive AdvantageAI can write code. It cannot have taste. Your sense of what’s useful, what’s elegant, what solves the real problem is the thing that makes your products different. Protect that. Develop it. Don’t let speed kill it.Know When to Stop Vibing and Start ThinkingSome problems need a whiteboard, not a prompt. Architecture decisions, data model design, security reviews. These are not vibe coding moments. Sit down, think it through, then come back to the AI.The Responsible Vibe Coder’s ChecklistBefore you ship anything:Did you read through every file that changed?Are all credentials in environment variables?Is your .gitignore set up correctly?Have you tested the happy path and at least two error cases?If there’s auth, did you verify unauthorized users can’t access protected routes?If there’s a database, did you check for injection risks?Did you verify every npm/pip package you installed is real?Do you understand what every API endpoint does and who can call it?The Mindset ShiftVibe coding is not about trusting AI blindly. It’s about using AI as leverage while keeping your brain in the loop.The best vibe coders I know are not the ones who prompt the hardest. They’re the ones who review the sharpest. They ship fast because they’ve built the habits that let them move quickly without things falling apart.You don’t have to choose between speed and quality. You just have to be intentional about both.Now go build something.Sunith VS is an indiehacker and vibecoder building products at the intersection of developer tools and travel tech. Creator of JioBase, DevB.ioLinks:JioBase: https://jiobase.comX: https://x.com/sunithvs_/Sunith V S: https://sunithvs.comGitHub: https://github.com/sunithvs/jiobaseBuy Me a Coffee: https://buymeacoffee.com/sunithvs

jiobase.com to fix supabase block in indiaYour Supabase app stopped working in India. Here’s exactly what happened, why the usual fixes won’t help, and how to get your app running again for all your users in under 5 minutes.On February 24, 2026, I woke up to a dead app.My Supabase-powered project, the one I’d been building for months, was returning ERR_CONNECTION_TIMED_OUT on every single API call. Auth broken. Database unreachable. Realtime gone. Production users in India couldn't do anything.I wasn’t alone. Thousands of developers across India woke up to the same nightmare.What HappenedIndia’s government issued a blocking order under Section 69A of the Information Technology Act. Major ISPs like Jio, Airtel, and ACT Fibernet started DNS-blocking all subdomains under *.supabase.co.Here’s the frustrating part:supabase.com (the marketing site and dashboard) still works fine*.supabase.co (your actual API endpoint) is blockedSo you can log into the Supabase dashboard, stare at your perfectly healthy database, and watch helplessly as your production app can’t reach it.The Technical DetailsThe block works through DNS poisoning. When a user on Jio tries to resolve yourproject.supabase.co, instead of getting Supabase's real IP, their ISP returns a sinkhole IP like 49.44.79.236 (owned by Reliance, not AWS where Supabase actually lives). The connection hangs until it times out.This affects every Supabase service:REST API (PostgREST) queriesAuthentication flowsFile uploads and downloads (Storage)Edge FunctionsRealtime WebSocket connectionsGraphQLThe Scale of the ProblemThis isn’t a minor inconvenience. India is Supabase’s 4th-largest market globally, accounting for roughly 9% of global traffic. Supabase received approximately 365,000 visits from India in January 2026 alone, growing 179% year-over-year.Jio alone has 500+ million subscribers. Combined with Airtel and ACT Fibernet, the block potentially affects hundreds of millions of internet users whose apps silently break.No prior notice was given. No public explanation. No timeline for resolution.As of today, the block is still active.Why the Usual Fixes Don’t Work“Just change your DNS to 1.1.1.1”This might fix your development machine. But you can’t ask your users to change their DNS settings. If you have 10,000 users on Jio, you now have 10,000 users who can’t use your app. That’s a workaround for one person, not a solution.Some ISPs are also reportedly using deep packet inspection (DPI) alongside DNS poisoning, which means even changing DNS doesn’t always work.“Just use a VPN”Same problem. You can VPN yourself out of the block, but your production app’s end users aren’t going to install Cloudflare WARP just to use your to-do list app.“Switch to a Supabase custom domain”Supabase does offer custom domains on paid plans, which would bypass the DNS block. But this requires a paid Supabase plan, DNS configuration, and doesn’t cover all edge cases. If you’re on the free tier like most Indian developers and students, this isn’t an option.The Real Fix: A Reverse ProxyThe solution is straightforward. Instead of your app talking directly to yourproject.supabase.co (which is blocked), route the traffic through a proxy on a domain that isn't blocked.Your App -> your-proxy.example.com -> yourproject.supabase.co (not blocked) (blocked, but proxy isn't on Indian ISP)The proxy lives on Cloudflare’s edge network. Cloudflare Workers domains aren’t blocked. The proxy receives your request, forwards it to Supabase, gets the response, and sends it back. From the ISP’s perspective, your app is just talking to a Cloudflare domain.Everything works transparently. REST, Auth, Storage, Edge Functions, Realtime WebSockets. Your anon key, service role key, and all Row Level Security policies stay exactly the same.Option 1: Use JioBase (2 minute fix)JioBase is a free managed proxy I built specifically for this problem. It handles all the infrastructure so you don’t have to.Step 1: Sign up at app.jiobase.comStep 2: Create an app and enter your Supabase project URL (https://yourproject.supabase.co)Step 3: Change one line of code in your app:// Beforeconst supabase = createClient( 'https://yourproject.supabase.co', 'your-anon-key');// Afterconst supabase = createClient( 'https://your-slug.jiobase.com', // Just change this URL 'your-anon-key' // Key stays the same);Step 4: Deploy. Done.JioBase proxies everything: REST, Auth, Storage, Edge Functions, Realtime WebSockets. Your Supabase project doesn’t know the difference. Your users don’t know the difference. Everything just works again.Option 2: Self-Host a Cloudflare WorkerIf you’d rather control the infrastructure yourself, here’s a minimal Cloudflare Worker that does the same thing:export default { async fetch(request) { const url = new URL(request.url); const SUPABASE_URL = 'https://yourproject.supabase.co'; const target = new URL(url.pathname + url.search, SUPABASE_URL); const headers = new Headers(request.headers); headers.set('Host', new URL(SUPABASE_URL).hostname); if (request.headers.get('Upgrade') === 'websocket') { return fetch(target.toString(), { headers, method: request.method }); } const response = await fetch(target.toString(), { method: request.method, headers, body: request.body, }); const responseHeaders = new Headers(response.headers); responseHeaders.set('Access-Control-Allow-Origin', '*'); responseHeaders.set('Access-Control-Allow-Methods', 'GET, POST, PUT, PATCH, DELETE, OPTIONS'); responseHeaders.set('Access-Control-Allow-Headers', request.headers.get('Access-Control-Request-Headers') || '*'); return new Response(response.body, { status: response.status, headers: responseHeaders, }); },};Deploy with:npx wrangler deployThen update your Supabase client URL to point to your Worker’s URL (e.g., https://supabase-proxy.your-account.workers.dev).Limitations of self-hosting: You’ll need to handle rate limiting, monitoring, and WebSocket edge cases yourself. Cloudflare’s free tier gives you 100,000 requests per day, which is enough for most small to medium apps.Option 3: Supabase Custom Domain (Paid Plans)If you’re on a Supabase paid plan:Go to Project Settings > Custom DomainsAdd your own domain (e.g., api.yourdomain.com)Configure the DNS records Supabase providesUpdate your client to use the custom domainThis bypasses the block because traffic goes through your domain, not *.supabase.co. However, this requires a paid Supabase plan and DNS access to your domain.How to Test if You’re AffectedNot sure if the block is hitting you? Run this in your terminal:nslookup yourproject.supabase.coIf you see an IP like 49.44.79.236 or any Reliance-owned IP instead of an AWS IP, you're being DNS-poisoned.You can also test from your browser’s developer console:fetch('https://yourproject.supabase.co/rest/v1/', { headers: { 'apikey': 'your-anon-key' }}).then(r => console.log('Status:', r.status)).catch(e => console.log('Blocked:', e.message));If it times out, the block is active on your network.FAQIs this legal? Can I use a proxy to bypass the block?Using a reverse proxy is a standard networking practice. You’re not bypassing the block for end users. You’re routing your application’s API traffic through your own infrastructure. This is architecturally no different from putting CloudFront or any CDN in front of your backend.Will this affect my Supabase security?No. The proxy is a transparent pass-through. All headers, tokens, and keys are forwarded unchanged. Your Row Level Security policies, auth rules, and API permissions work exactly the same way.Will there be added latency?Minimal. Cloudflare has edge nodes in Mumbai, Chennai, and other Indian cities. The proxy adds 1–5ms of overhead, unnoticeable in practice.What if the block gets lifted?You can switch back to the direct Supabase URL anytime. If you’re using JioBase, just change one line of code back. Having a proxy in place is also good insurance against future blocks.Is Firebase also blocked?There have been reports of Firebase services being affected on some ISPs. If you’re experiencing similar issues with Firebase, the same proxy approach works.Why I Built JioBaseI’m Sunith, a solo developer from India. When the Supabase block hit, it broke my own production app. I spent a weekend building a Cloudflare Worker proxy to fix it. Then I realized every other Indian developer with a Supabase app was scrambling to do the same thing.So I turned it into JioBase. A free, managed proxy that anyone can set up in 2 minutes. No infrastructure to manage. No Cloudflare account needed. Just change one URL and your app works again.It’s open source (AGPLv3), runs entirely on Cloudflare’s edge network, and it’s free because no developer should have to pay to fix someone else’s problem.If JioBase helps you, consider buying me a coffee. I pay the Cloudflare bills out of my own salary, and every bit of support helps keep the service running for everyone.Links:JioBase: https://jiobase.comSunith V S: https://sunithvs.comGitHub: https://github.com/sunithvs/jiobaseSupabase GitHub Issue: #43142Buy Me a Coffee: https://buymeacoffee.com/sunithvs

The Lazy Developer’s Guide to Automation: How I Made GitHub Work for MePicture this: It’s another busy day at work, and I’m juggling multiple hotfixes for our Eduport . Each fix requires creating a pull request, following the proper formatting, linking the correct ticket ID, and ensuring it goes to the right branch. It’s not rocket science, but it’s repetitive, time-consuming, and frankly, boring. As a developer who believes in the DRY (Don’t Repeat Yourself) principle, this manual PR creation process felt like a personal affront to my lazy — I mean, efficient — nature.The Breaking PointAfter the 5th PR of the day, I had enough. My inner voice screamed, “There has to be a better way!” That’s when it hit me: if I was going to be lazy, I needed to be smart about it. The best developers aren’t the ones who enjoy repetitive tasks; they’re the ones who automate them away.The Solution: GitHub Actions to the RescueI decided to create a GitHub Action that would handle the entire PR creation process automatically. The concept was simple: embed all the necessary information in the commit message, and let the automation handle the rest. Want to create a PR? Just include “pr to” and a ticket ID in your commit message, and boom — the robot takes care of everything else.Here’s what my lazy (but brilliant) solution does:Creates PRs automatically based on commit messagesExtracts ticket IDs and links them properlyHandles branch targeting with a fallback mechanismApplies a standardized PR templateManages protected branch rulesThe Magic FormatThe beauty lies in its simplicity. Instead of navigating through GitHub’s UI, all I need to do is:git commit -m "feat: add awesome feature pr to main with 12345"That’s it. No clicking through web interfaces, no copy-pasting ticket numbers, no filling out PR templates. The action takes care of everything, creating a perfectly formatted PR with all the necessary components.Why This Makes Me a Better DeveloperSome might say this is just lazy. I say it’s strategic laziness. By automating this process, I’ve:Eliminated human error in PR creationStandardized our team’s PR formatSaved countless hours of manual workFreed up mental space for actual problem-solvingAnd there is an option to edit pr so this is not an end.The Ironic TruthHere’s the thing about lazy developers: we often work harder initially to work less later. The time I spent creating this GitHub Action was probably more than what I’d spend creating PRs manually for a month. But that’s not the point. The point is that every automated task is a small victory against tedium, a step toward a more efficient workflow.ConclusionThey say lazy people find the easiest way to do things. I prefer to think of it as finding the smartest way. In software development, automation isn’t just about being lazy — it’s about being efficient, consistent, and focusing on what truly matters: solving problems and creating value.So the next time someone calls you lazy for automating your workflow, remember: you’re not lazy, you’re just living in 2025 while they’re stuck in the manual labor of 2020.P.S. If you’re interested in implementing this yourself, check out my GitHub Action configuration. Because sharing automation is caring… and also because I’m too lazy to keep explaining how it works to everyone who asks.Originally published by a proudly lazy developer who now has more time to write blog posts about being lazy.Github Action: HereIf you enjoyed this post, connect with me on LinkedIn and follow me on GitHub for more fun project stories, creative experiments, and ideas that go beyond typical development. Let’s connect, share, and keep building cool things together!LinkedIn: sunithvsGitHub: sunithvswebsite: sunithFollow along for more unique project stories and engineering adventures!
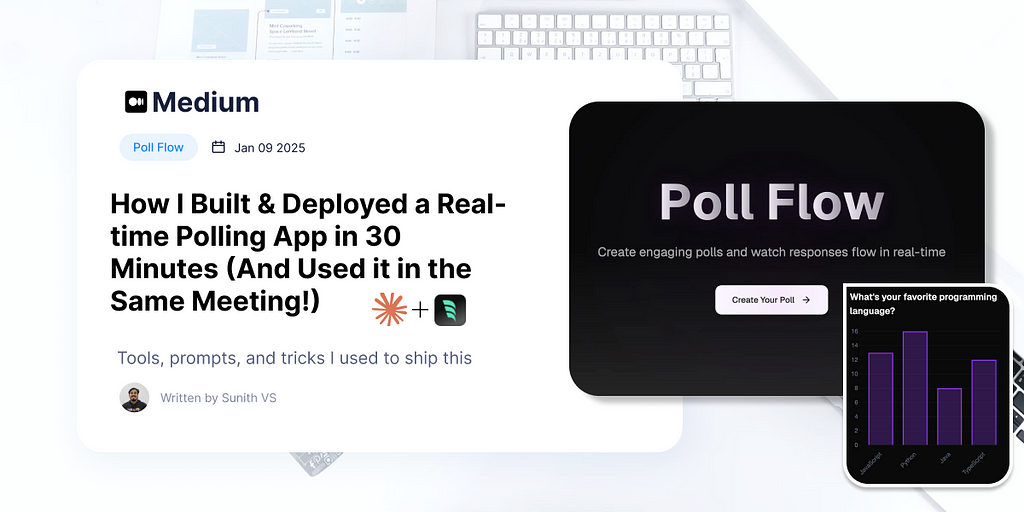
So today during our sprint meeting, something pretty relatable happened. We needed to run some quick polls, but got annoyed with all the ads and complex UIs in the existing tools. You know how it goes — you just want to create a simple poll, but end up clicking through five screens and closing popup ads 🤦♂️Live Link: polls.radr.inThe Lunch Break ChallengeI figured — hey, why not build something super simple? Had about an hour during lunch, so I decided to give it a shot. Having just learned about Supabase’s real-time features, I thought — perfect opportunity to put this knowledge to use.The goal was straightforward:Create polls quicklySee results in real-timeNo ads, no fluffThe Implementation JourneyStep 1: Planning with AIFirst, I turned to Claude to help me structure the project. I asked for a detailed prompt to generate this application, and it provided an extensive specification covering everything from database schema to user flows. Here’s what the conversation looked like:Me:I need to create a poll app using next js and supabasewhere a user can create polls and share a unique url to send to other usersso when other user opens the link they will get the poll with question they can submit the poll with thire name (name mandatory) and then go to a results pagewhere live updates ( use supabase realtime) to upodate the resultsthe user created the poll can edit the poll and clear the results and after editing the poll also clear the resultscreate a detailed prompt to generate this using bolt or v0 dont write the code just a detailed promptClaude came back with a comprehensive prompt :Create a real-time polling application using Next.js and Supabase with the following specifications:Database Schema:1. Polls table - id (uuid, primary key) - creator_id (reference to users) - question (text) - created_at (timestamp) - last_edited_at (timestamp) - is_active (boolean) - url_slug (unique string for sharing)2. Options table - id (uuid, primary key) - poll_id (reference to polls) - option_text (text)3. Responses table - id (uuid, primary key) - poll_id (reference to polls) - option_id (reference to options) - respondent_name (text, not null) - submitted_at (timestamp)Features and Pages:1. Poll Creation Page ('/create') - Form to input poll question - Dynamic addition of poll options (minimum 2) - Auto-generation of unique URL slug - Success message with shareable link - Error handling for form submission2. Poll Voting Page ('/{poll-slug}') - Display poll question and options - Required name input field - Submit button for vote - Validation for duplicate votes - Redirect to results page after voting - Error handling for invalid poll URLs3. Poll Results Page ('/{poll-slug}/results') - Real-time results using Supabase subscriptions - Bar chart or visual representation of votes - List of respondents with timestamps - Percentage breakdown of each option - Total vote count4. Poll Management Page ('/manage/{poll-slug}') - Edit poll question and options - Clear all results functionality - Confirmation modals for destructive actions - Auto-update of last_edited_at - Clear results after editingTechnical Requirements:1. Authentication - Simple authentication for poll creators - Public access for poll voters2. Real-time Features - Supabase real-time subscriptions for live results - Optimistic updates for better UX3. Data Validation - Server-side validation for all inputs - Prevention of duplicate votes - Required name field validation4. URL Management - Unique, readable URL slugs - Proper error handling for invalid URLs5. State Management - Client-side state for form handling - Server state for real-time updates6. Error Handling - Graceful error handling for all API calls - User-friendly error messages - Loading states for all async operations7. Responsive Design - Mobile-first approach - Accessible UI components - Clear visual hierarchyAdditional Features:1. Copy to clipboard functionality for share URLs2. Loading skeletons for better UX3. Toast notifications for actions4. Basic analytics (vote counts, submission times)5. Rate limiting for submissionsThe application should follow these flows:1. Poll Creation Flow: - Creator fills form → Validates input → Generates URL → Shows success with share link2. Voting Flow: - User opens shared link → Enters name → Submits vote → Redirects to results3. Results View Flow: - Real-time updates of votes → Visual representation → List of respondents4. Edit Flow: - Creator accesses management page → Makes changes → Confirms → Clears existing votesEnsure all database operations are optimized and implement proper error boundaries for production use.Step 2: Database SetupI took this prompt and asked Claude to generate the actual database SQL. Within seconds, it provided the complete schema:CREATE EXTENSION IF NOT EXISTS "uuid-ossp";-- Create polls tableCREATE TABLE polls ( id UUID PRIMARY KEY DEFAULT uuid_generate_v4(), question TEXT NOT NULL CHECK (char_length(question) > 0), created_at TIMESTAMP WITH TIME ZONE DEFAULT CURRENT_TIMESTAMP, last_edited_at TIMESTAMP WITH TIME ZONE DEFAULT CURRENT_TIMESTAMP, is_active BOOLEAN DEFAULT true, url_slug TEXT UNIQUE NOT NULL CHECK (char_length(url_slug) > 0), CONSTRAINT valid_question_length CHECK (char_length(question) <= 500));-- Create poll options tableCREATE TABLE options ( id UUID PRIMARY KEY DEFAULT uuid_generate_v4(), poll_id UUID NOT NULL REFERENCES polls(id) ON DELETE CASCADE, option_text TEXT NOT NULL CHECK (char_length(option_text) > 0), created_at TIMESTAMP WITH TIME ZONE DEFAULT CURRENT_TIMESTAMP, CONSTRAINT valid_option_length CHECK (char_length(option_text) <= 200));-- Create responses tableCREATE TABLE responses ( id UUID PRIMARY KEY DEFAULT uuid_generate_v4(), poll_id UUID NOT NULL REFERENCES polls(id) ON DELETE CASCADE, option_id UUID NOT NULL REFERENCES options(id) ON DELETE CASCADE, respondent_name TEXT NOT NULL CHECK (char_length(respondent_name) > 0), submitted_at TIMESTAMP WITH TIME ZONE DEFAULT CURRENT_TIMESTAMP, CONSTRAINT valid_respondent_name_length CHECK (char_length(respondent_name) <= 100));-- Create indexes for better query performanceCREATE INDEX idx_polls_url_slug ON polls(url_slug);CREATE INDEX idx_options_poll_id ON options(poll_id);CREATE INDEX idx_responses_poll_id ON responses(poll_id);CREATE INDEX idx_responses_option_id ON responses(option_id);CREATE INDEX idx_responses_submitted_at ON responses(submitted_at);Step 3: Project SetupWith the database schema ready, it was time to create the project:npx create-next-app -e with-supabase pollStep 3: The Magic HappensThe real fun began when I fired up WindSurf and started building. The AI prompts gave me a solid foundation, but now it was time to bring it to life. Here’s how the conversation went:First, I started with the prompt from Claude and asked for a basic polling app. It gave me a functional app right out of the gate! The best part? The real-time features were already included — I just needed to enable them in Supabase. The UI was’nt that much great at first time.Just this one line, and boom! The create page went from plain to pretty, while keeping all the features intact.With This I got a great UI for the create,poll and results page. And I hosted the first version in vercel and connected polls.radr.in.I needed a landing page for it so continued the promptingAnd I got a stunning animation which you can see in the website polls.radr.in.The Fun PartThe best thing? Made it just in time before the meeting resumed, and we actually used it for the rest of our polls! Sometimes skipping a meal is worth it when you’re in the flow 😄 .Those hours spent learning Supabase really paid off — from experimentation to actual use in just a week.The code’s on GitHub if anyone wants to check it out. Nothing fancy, just a simple solution to an annoying problem!Github Repo: https://github.com/sunithvs/poll-flowIf you enjoyed this post, connect with me on LinkedIn and follow me on GitHub for more fun project stories, creative experiments, and ideas that go beyond typical development. Let’s connect, share, and keep building cool things together!LinkedIn: sunithvsGitHub: sunithvswebsite: sunithFollow along for more unique project stories and engineering adventures!

Stop context switching between branches and boost your development workflow with Git’s hidden powerhouse feature.The Developer’s Git ChallengeIf you’re working on multiple Git branches simultaneously, you’ve probably experienced this: Feature development interrupted by urgent production bugs, constant branch switching, and the dreaded git stash dance. Sound familiar? There's a powerful Git feature that could transform your workflow.At Eduport, I managed different tasks by making multiple copies of the code and switching between them. While this let me work on new features and quick fixes at the same time, it made it tricky to keep everything in sync, especially when dealing with database migrations and change in environment variables, then I found git worktreeAdvanced Git Techniques: Introducing Git WorktreeWhile most developers rely on basic Git commands, experienced users leverage Git Worktree to maintain multiple working directories connected to the same repository. This advanced technique eliminates the overhead of branch switching and context management.Why You Should Use Git WorktreeHandle multiple branches simultaneouslyZero context switching overheadMaintain separate development environmentsNo more git stash hasslesClean separation of concernsImproved code organizationWorktree ImplementationHere the list of commands used to add worktreegit clone <repository-url>cd <repository-name># Create parallel working directoriesgit worktree add ../path branch-namegit worktree add ../hotfix urgent-fixgit worktree add ../feature-1 new-developmentgit worktree add ../debug debug/production-iHandling Production EmergenciesTraditional Git Workflow:git stash save "feature work"git checkout productiongit checkout -b hotfix/bug# Fix buggit checkout maingit stash popAdvanced Worktree Workflow:git worktree add ../hotfix hotfix/bugcd ../hotfixIts super easy right 🤩Advanced Git Techniques: Quick ReferenceEssential worktree commands for improved productivity:# List all worktreesgit worktree list# Add new worktreegit worktree add ../path branch-name# Remove worktreegit worktree remove ../path# Cleanup stale worktreesgit worktree pruneRemember to keep it simple:Use clear directory namesGroup worktrees in one parent folderClean up when doneAdvanced Git workflows require practice. Start with simple scenarios and gradually incorporate more complex patterns as your team adapts.For more advanced usage and full documentation refer here.The transition from traditional branch switching to Git worktree management is an investment in your development workflow that pays dividends in productivity and organization.If find this post useful, connect with me on LinkedIn and follow me on GitHub for more fun project stories, creative experiments, and ideas that go beyond typical development. Let’s connect, share, and keep building cool things together!LinkedIn: sunithvsGitHub: sunithvswebsite: sunithFollow along for more unique project stories, productivity tools and engineering adventures!

Ever heard of a project that started with a simple quest to find a Valentine? Let me tell you about Minglikko one of the best memories from cusat, a wild ride of creativity and engineering that began in February 2022!The Origin StoryPicture this: Sahil, Rohit, Varsha, Nihal, and Sabeeh are brainstorming how to find a Valentine for Varsha. But being engineers, we couldn’t just settle for a typical matchmaking approach. We thought, “What if we create something unique?”Our initial idea was simple — a Google Form will be filled by users those who want to find a Valentine and that matches people based on interests. But we wanted more. There our design wizard Amrutha Chechi enters and transformed our basic concept into an amazing website design.The ChallengeThe google form is to much limted and Airtable’s has the features but free plan has some limitations , so we decided to build a full-fledged platform where users could:Create a loginAnswer interesting questionsRemain completely anonymousMark their prioritiesPerform match making algorithmChat with matched valentine.Amrutha Dinesh’s UI was so fantastic it put us under pressure to release quickly (and this was before ChatGPT existed — imagine that! 😂) Without that design, we wouldn’t have envisioned such a comprehensive platform or achieved that level of outreach. Kudos to Amrutha chechi!The questions and texts were placeholders in actual website there are some changes.Launch and BuzzWe dropped a “Coming Soon” poster with the name “Minglikko” — and boom! Curiosity exploded in and around CUSAT. Random friends and strangers were sliding into our DMs, asking, “What is this?” Within just hours of launching, we saw incredible traction — from initial 100 registrations in 1 hr to over 500 registrations by midnight. Turns out, everyone was desperate to find a Valentine! 😂On the night of February 13th, we faced a critical challenge — our matching algorithm wasn’t ready. Despite the website launch, we continued working intensively to develop a robust matching system throghout night.The matching algorithm was a team effort, with Sahil Athrij playing a crucial role in developing the core logic. Together with Rohit, Varsha, Shaheen, Nihal Muhemmed, and Sabeeh, we crafted it.Our dedication paid off when we successfully presented a research paper about this algorithm at The Gandhigram Rural Institute , Dindigul District , with Sasi Gopalan Sir as our mentor.Questions and Gender “Feature”When we released the website, some of my friends complained that there was no section for entering gender (we did this intentionally, not by accident!). As feature requests kept piling up, we — well, actually Rohit — decided to add a gender selection box on the homepage. He included an extensive list of 140 genders just for fun, but it was purely cosmetic. The matching algorithm didn’t consider gender at all, and we didn’t even store the selected data. 😄The questions we asked were designed to be a little quirky and fun, bringing out each person’s personality. Here’s the list:Rate your Brains.🧠(0: Brain Potato, 5: Omniscient)Show me your biceps.💪(0: Pappadam, 5: Hercules)Beauty undo?(0: Mirrors scare me, 5: Cleopatra)How Charismatic you are?(0: Bed is my valentine, 5: I sell sand in Sahara)How much money you burn?🤑(0: Starving to Death, 5: I pave golden roads)Generosity, yes rate it.😇(0: I burn orphanages, 5: Karl Marx)You die for God?(0: I am become Death. -J Robert Oppenheimer, 5: I am become Death. -Krishna)Your connection with Liberalism🧐(0: Girls? No School!!, 5: Martin Luther King)Each question had up to 5 points, but users could only give a total of 20 points across all questions. This made them think carefully about which traits to prioritise, guessing what would matter most to their perfect match — a fun little game of planning to find their Valentine!The Fun FinaleWe finaly released the matches and our Valentine’s mission was a success. We created a platform that helped Varsha find her Valentine and provided opportunities for others. What started as a friend’s matchmaking quest turned into a memorable campus memory.Technical JourneyAs a Django pro 😎, backend development was my playground. The server-side logic and database management flowed smoothly, with API integration happening at lightning speed. However, the frontend was adifferent story — a real challenge that had us scratching our heads.Stepping up to the plate, SANU MUHAMMED brought his UI expertise and completely transformed our basic interface.Chat System: Implemented end-to-end encryption using Signal Protocol, ensuring user privacy and secure communicationBackend Infrastructure: Used Django for robust and fast server-side developmentMatching Algorithm: Developed a custom algorithm to connect compatible users based on their interests and preferencesAnonymous Identities: Created unique code names like “Shikkari Kuyil” to protect user anonymityReal-time Communication: Utilized Django Channels for seamless, instant messagingAWS : used aws ec2 for hosting the entire platform.Collaborative Development: Team effort involving Sahil, Rohit, Varsha, Shaheen, Nihal ,Sanu and SabeehIf you enjoyed this post, connect with me on LinkedIn and follow me on GitHub for more fun project stories, creative experiments, and ideas that go beyond typical development. Let’s connect, share, and keep building cool things together!LinkedIn: sunithvsGitHub: sunithvswebsite: sunithvsFollow along for more unique project stories and engineering adventures!

As a Django developer, you may have encountered a common performance issue called the N+1 query problem. This can severely impact the speed and efficiency of your application, especially as your codebase and data grow.In this blog post, we’ll dive into what the N+1 query problem is, why it’s a problem, and how you can easily solve it using Django’s powerful tools.What is the N+1 Query Problem?Imagine you have a Django application with three models: Company, Employee, and Project. You want to display a list of all companies, along with the names of their employees and the projects those employees are working on.class Company(models.Model): name = models.CharField(max_length=100)class Employee(models.Model): name = models.CharField(max_length=100) company = models.ForeignKey(Company, on_delete=models.CASCADE, related_name='employees')class Project(models.Model): name = models.CharField(max_length=100) employees = models.ManyToManyField(Employee, related_name='projects')Without any optimizations, your view might look something like this:class CompanyListNoOptimisationView(View): def get(self, request): companies = Company.objects.all() # 1 query for all companies data = [] for company in companies: company_data = { 'name': company.name, 'employees': [ { 'name': employee.name, 'projects': [project.name for project in employee.projects.all()] # 1 query per employee for projects } for employee in company.employees.all() # 1 query per company for employees ] } data.append(company_data) return JsonResponse(data, safe=False)In this scenario, the initial query fetches all the companies. But then, for each company, an additional query is made to fetch the employees, and for each employee, another query is made to fetch the projects. This results in a total of N+1 queries, where N is the number of companies.Query Count BreakdownLet’s consider an example scenario with the following data:2 companies3 employees per company2 projects per employeeIn this case, the total number of queries generated would be:1 query to fetch all companies.1 query per company to fetch employees:2 companies = 2 queries for employees.1 query per employee to fetch projects:2 companies × 3 employees = 6 queries for projects.Total queries: 1 (company) + 2 (employees) + 6 (projects) = 9 queries.Total time: 0.03sNumber of queries: 9Query 1: SELECT "base_company"."id", "base_company"."name" FROM "base_company"Query 2: SELECT "base_employee"."id", "base_employee"."name", "base_employee"."company_id" FROM "base_employee" WHERE "base_employee"."company_id" = 1Query 3: SELECT "base_project"."id", "base_project"."name" FROM "base_project" INNER JOIN "base_project_employees" ON ("base_project"."id" = "base_project_employees"."project_id") WHERE "base_project_employees"."employee_id" = 1Query 4: SELECT "base_project"."id", "base_project"."name" FROM "base_project" INNER JOIN "base_project_employees" ON ("base_project"."id" = "base_project_employees"."project_id") WHERE "base_project_employees"."employee_id" = 2Query 5: SELECT "base_project"."id", "base_project"."name" FROM "base_project" INNER JOIN "base_project_employees" ON ("base_project"."id" = "base_project_employees"."project_id") WHERE "base_project_employees"."employee_id" = 4Query 6: SELECT "base_employee"."id", "base_employee"."name", "base_employee"."company_id" FROM "base_employee" WHERE "base_employee"."company_id" = 2Query 7: SELECT "base_project"."id", "base_project"."name" FROM "base_project" INNER JOIN "base_project_employees" ON ("base_project"."id" = "base_project_employees"."project_id") WHERE "base_project_employees"."employee_id" = 3Query 8: SELECT "base_project"."id", "base_project"."name" FROM "base_project" INNER JOIN "base_project_employees" ON ("base_project"."id" = "base_project_employees"."project_id") WHERE "base_project_employees"."employee_id" = 5Query 9: SELECT "base_project"."id", "base_project"."name" FROM "base_project" INNER JOIN "base_project_employees" ON ("base_project"."id" = "base_project_employees"."project_id") WHERE "base_project_employees"."employee_id" = 6[11/Nov/2024 19:33:30] "GET /company-list/ HTTP/1.1" 200 379This logs are generated by QueryCounterMiddleware more about that at end.The problem with this approach is that as the number of companies, employees, and projects grows, the number of queries will increase dramatically, leading to slow response times and high database load.Solving the N+1 Problem with select_related and prefetch_relatedselect_related: Used for foreign key or one-to-one relationships. It performs a SQL join and retrieves the related object in a single query.prefetch_related: Used for many-to-many and reverse foreign key relationships. It performs a second query and maps the results in Python.These tools allow us to reduce query counts by loading all related objects in bulk. Here’s the same view, but now using select_related and prefetch_relatedclass CompanyListOptimisedView(View): def get(self, request): companies = Company.objects.prefetch_related( Prefetch('employees', queryset=Employee.objects.select_related('company').prefetch_related('projects')) ) data = [] for company in companies: company_data = { 'name': company.name, 'employees': [ { 'name': employee.name, 'projects': [project.name for project in employee.projects.all()] } for employee in company.employees.all() ] } data.append(company_data) return JsonResponse(data, safe=False)Query Count Breakdown (Optimised)Now, with the optimised code:1 query to fetch all companies.1 query to fetch all employees with their related company data (using select_related).1 query to fetch all projects for all employees (using prefetch_related).Total queries: 3Total time: 0.02sNumber of queries: 3Query 1: SELECT "base_company"."id", "base_company"."name" FROM "base_company"Query 2: SELECT "base_employee"."id", "base_employee"."name", "base_employee"."company_id", "base_company"."id", "base_company"."name" FROM "base_employee" INNER JOIN "base_company" ON ("base_employee"."company_id" = "base_company"."id") WHERE "base_employee"."company_id" IN (1, 2)Query 3: SELECT ("base_project_employees"."employee_id") AS "_prefetch_related_val_employee_id", "base_project"."id", "base_project"."name" FROM "base_project" INNER JOIN "base_project_employees" ON ("base_project"."id" = "base_project_employees"."project_id") WHERE "base_project_employees"."employee_id" IN (1, 2, 4, 3, 5, 6)[11/Nov/2024 19:40:05] "GET /company-list-optimised/ HTTP/1.1" 200 379By applying select_related and prefetch_related,we reduced the query count from 9 to 3, achieving a significant performance improvement.QueryCounterMiddlewareimport timefrom django.db import connectionfrom django.conf import settingsfrom django.utils.deprecation import MiddlewareMixinclass QueryCounterMiddleware(MiddlewareMixin): def process_request(self, request): if settings.DEBUG and settings.SHOW_RAW_QUERY or settings.SHOW_QUERY_COUNT: # Only proceed if DEBUG is True self.start_time = time.time() self.queries_before_request = len(connection.queries) def process_response(self, request, response): if settings.DEBUG and settings.SHOW_RAW_QUERY or settings.SHOW_QUERY_COUNT: # Only proceed if DEBUG is True total_time = time.time() - self.start_time queries_after_request = len(connection.queries) if settings.SHOW_QUERY_COUNT: query_count = queries_after_request - self.queries_before_request # Printing labels in yellow and values in green print(f"\033[93mTotal time:\033[0m \033[92m{total_time:.2f}s\033[0m") print(f"\033[93mNumber of queries:\033[0m \033[92m{query_count}\033[0m") if settings.SHOW_RAW_QUERY: # ANSI escape code for red color is '\033[91m' and reset color with '\033[0m' for index, query in enumerate(connection.queries[self.queries_before_request:], start=1): sql_query = query['sql'] print(f"\033[92mQuery {index}:\033[0m \033[91m{sql_query}\033[0m") return responseThe QueryCounterMiddleware is a custom Django middleware that provides a simple way to monitor the performance of your application. It works by intercepting the request-response cycle and capturing information about the database queries executed during the process.Here’s what the middleware does:Track the Number of Queries: When a request is made, the middleware stores the initial number of executed queries. After the request is processed, it calculates the difference to determine the total number of queries executed during the request.Log the Raw SQL Queries: In addition to the query count, the middleware can also print the raw SQL queries executed during the request. This can be extremely helpful for identifying the root cause of performance issues.Measure the Total Request Time: The middleware also tracks the total time taken for the request-response cycle, providing valuable insights into the overall performance of your application.How to Use the QueryCounterMiddlewareTo use the QueryCounterMiddleware in your Django project, follow these steps:Add the Middleware to Your Project: Open your settings.py file and add the QueryCounterMiddleware to your MIDDLEWARE list:pMIDDLEWARE = [ # Other middleware classes... 'path.to.QueryCounterMiddleware', ]Configure the Middleware Behavior: You can control the behavior of the QueryCounterMiddleware by setting the following variables in your settings.py file:SHOW_QUERY_COUNT: If True, the middleware will print the total number of queries executed during the request.SHOW_RAW_QUERY: If True, the middleware will print the raw SQL queries executed during the request.Optimising your Django queries with select_related and prefetch_related can significantly improve application performance, especially when working with complex relationships. The N+1 query issue, though common, is avoidable with a few best practices, leading to faster, more efficient applications and a better user experience.If you found this post helpful, connect with me on LinkedIn and follow me on GitHub for more insights, blogs, and stories on Django, backend development, and scalable application design. Let’s connect and keep learning together!LinkedIn: sunithvsGitHub: sunithvsFollow for more Django, backend tips, and development stories!In Plain English 🚀Thank you for being a part of the In Plain English community! Before you go:Be sure to clap and follow the writer ️👏️️Follow us: X | LinkedIn | YouTube | Discord | Newsletter | PodcastCreate a free AI-powered blog on Differ.More content at PlainEnglish.ioOptimising Django Queries to Overcome the N+1 Problem! was originally published in Python in Plain English on Medium, where people are continuing the conversation by highlighting and responding to this story.
